How do I map my M: drive in Mac OS?
Mapping the departmental share drive, otherwise known as the M: drive, is useful when you need to access, save, and share files both on and off campus. Computers on campus provided by the university and connected to the Wolftech domain automatically map this drive upon login. Computers off campus, as well as those personal computers on campus, may need to map these drives manually. In order to do this, it will be necessary have the university's VPN client software installed on your machine.
Mapping the M: Drive

Fig. 1
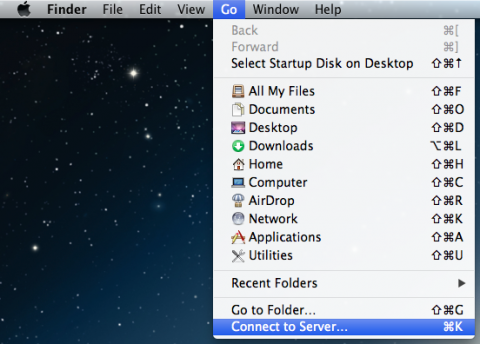
To map your M: drive, click on Go in the Finder menu (Fig. 1), and select Connect to Server. Alternatively, you can also use the hotkey combination Command (⌘) + K.

Fig. 2
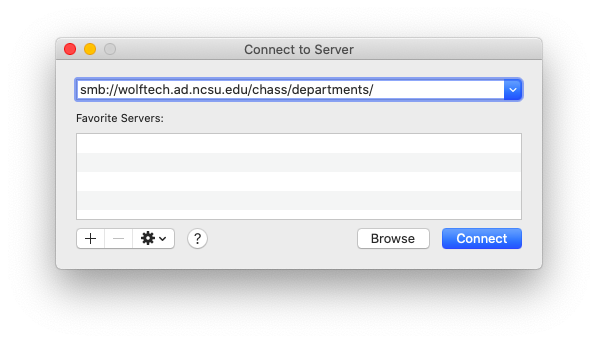
When the Connect to Server window appears (Fig. 2), in the box under Server Address, first type in: smb://wolftech.ad.ncsu.edu/chass/departments/
Then, enter in your department's directory after the final forward slash (see Fig. 3 below for a list of departmental directories).
Directories for CHASS Departments
| Department | Directory |
|---|---|
| CFFACE | cfface |
| CHASS IT | it |
| Communication | communication |
| Dean's Office | deansoffice |
| English | english |
| FLL | fll |
| History | history |
| Khayrallah Center | kclds |
| Philosophy and Religious Studies | philrel |
| Sociology and Anthropology | socant |
| Social Work | socialwork |
| SPIA | spia |
Fig. 3
For example, if your department is English, you would enter english as the directory. The server path would then look like this:
smb://wolftech.ad.ncsu.edu/chass/departments/english

Fig. 4
Note. Although you may have to map the drive again after each subsuquent logon, Mac OS can remember servers that you have previously mapped. Simply click on the + button (Fig. 4) to add the server path to your list of favorite servers.

Fig. 5
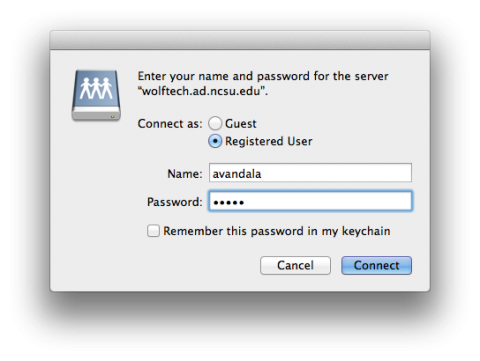
When the computer establishes an initial contact with the server, you will be prompted to enter your Unity ID and Password (Fig. 5). Do NOT select Remember this password in my keychain, as doing so may damage your permissions. When you have entered your login information, click Connect to map the drive.

Fig. 6
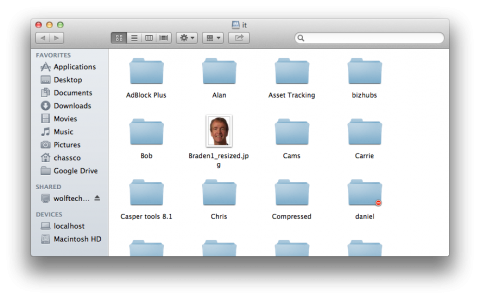
The M: drive should now be mapped on your computer, and its contents displayed in a new Finder window (Fig. 6).