How do I map my Y: drive in Windows?
Before You Begin
The purpose of this FAQ is to detail how to connect to the CHASS Y: drive, which is where datasets used in courses held in the college's instructional computer labs are stored. Students working on assignments off campus by using the campus Virtual Computing Lab (VCL) environment may need to access the Y: drive through their VCL instance in order to work on an assignment.
If connecting to the Y: drive from the VCL, you will not need to connect via a Virtual Private Network (VPN). However, if you are attempting to connect to the Y: drive from an off-campus, personally-owned computer, it will be necessary have the university's VPN client software installed and running on the machine beforehand.
Mapping the Y: Drive

Figure 1
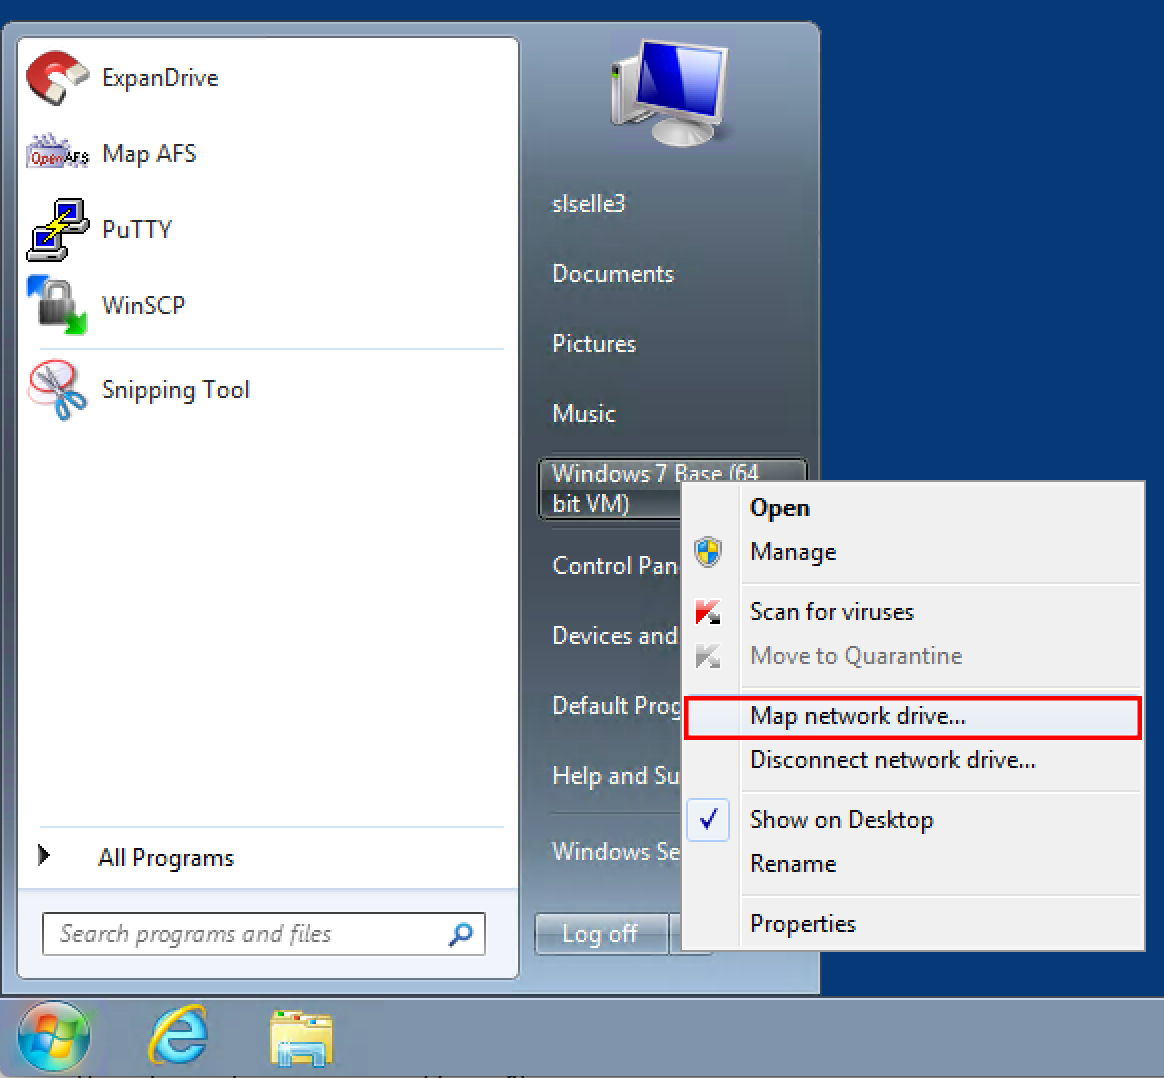
To map your Y: drive, click on the Start button, and right-click on Computer. Then, select Map network drive from the drop-down menu (Figure 1).

Figure 2
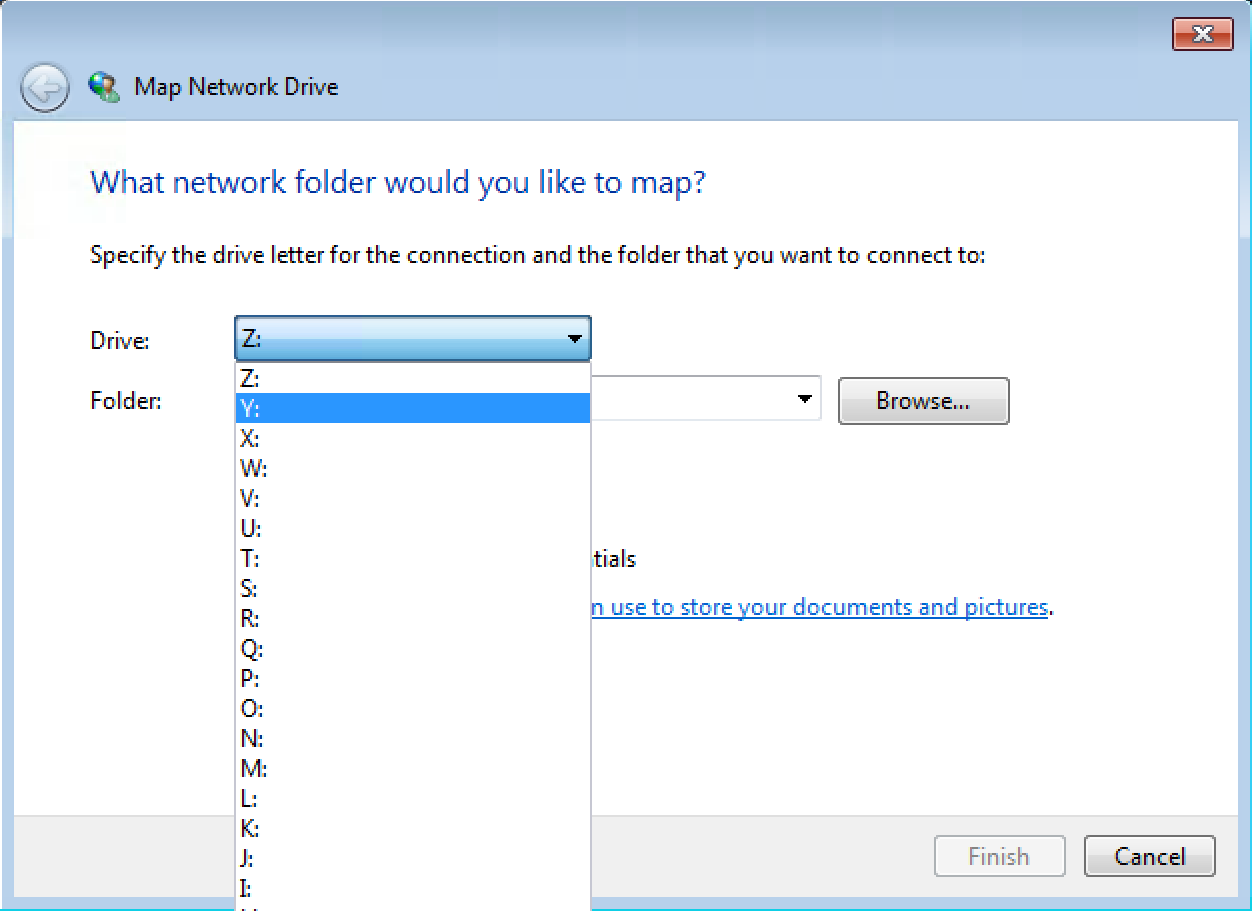
When the "Map Network Drive" window appears (Figure 2), click on the drop-down menu next to Drive, and select Y:.

Figure 3
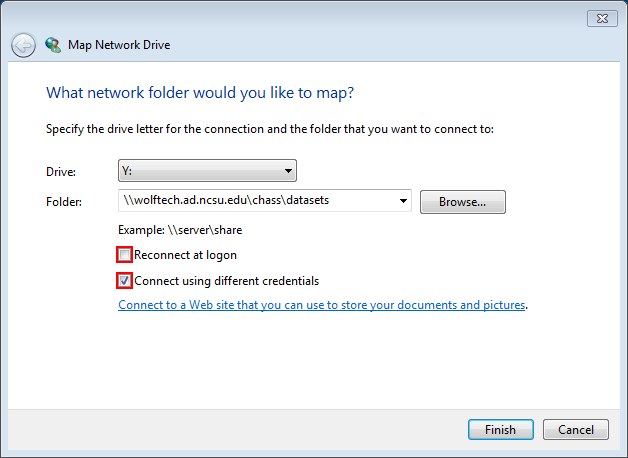
In the text box next to Folder, you can type in the server path for the mapped drive (Figure 3). In this case, \\wolftech.ad.ncsu.edu\chass\datasets.
Leave the Reconnect at logon checkbox deselected.
Ensure you check the Connect using different credentials checkbox, which will prompt you to enter your Unity ID and password rather than using that of your local machine's user account. If this option is NOT selected, Windows will attempt to map the drives using the account credentials of your local machine rather than your Unity ID and password. If this occurs five times in succession, it will result in your account being locked out.
To initiate the connection, click Finish.

Figure 4
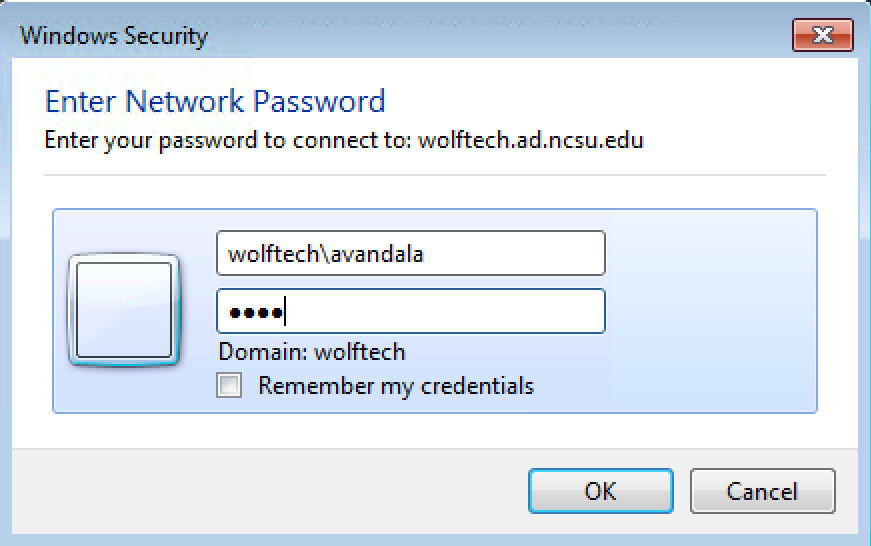
Please refer to Figure 4 on the proper way to enter your UNITY ID. You must first type wolftech\ and then enter your Unity ID after the final backslash. For example, if your UNITY ID was avandala, you would enter wolftech\avandala
It is important to leave Remember my credentials unchecked.
Click OK when finished.

Figure 5
Your Y: drive should then be successfully mapped, appearing in its own separate window (Figure 5).