How do I map my P: drive using ExpanDrive for Mac?
Although technically not required, it is recommended that you install and run the University's VPN client.
Installing ExpanDrive
To install ExpanDrive, you will need to use the Self Service Application. To learn how to do this, see the corresponding FAQs page here.
Mapping the P: Drive
Once ExpanDrive has been installed and opened, you can use it to map your P: drive.

Fig. 1
To begin, first, click on the + button at the bottom-left of the ExpanDrive window (Fig. 1).
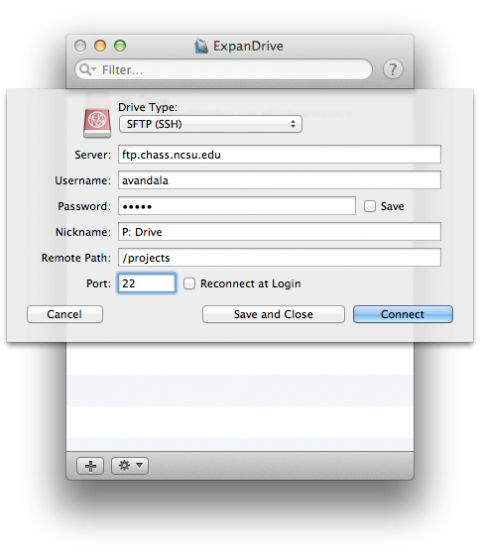
Fig. 2
A dialog box will drop down (Fig. 2), prompting you to enter in the appropriate settings for the P: drive.
For the Drive Type, select SFTP (SSH) from the drop-down menu, if it is not already selected by default.
In the box labeled Server, enter ftp.chass.ncsu.edu, entering in your UNITY ID and password in the Username and Password fields. Remember that when your password changes, you will need to also change it in any server settings that have been saved with this drive. To learn how to do this, click here.
You can technically put anything you want in the Nickname field, but for purposes of simplicity it is best to enter P: Drive.
For the Remote Path, enter /projects
For the Port, enter 22.
If you would like ExpanDrive to map the drive automatically after each reboot, select Reconnect at Login. Again, it is important to make sure that whenever your UNITY password is changed, you immediately change the password to match in the P: drive settings in ExpanDrive.
Finally, click Connect to map the drive, or you can select Save and Close to save the settings and map the drive later.
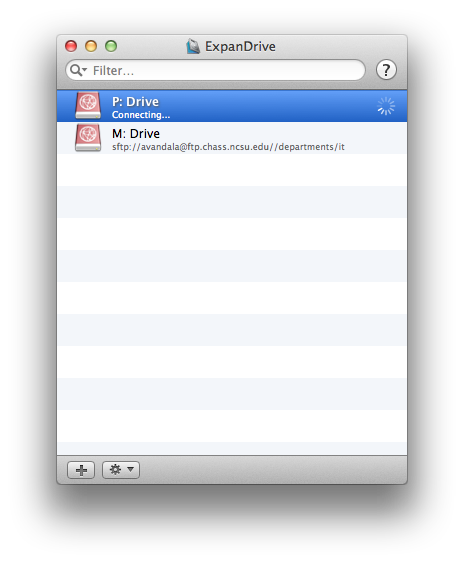
Fig. 3
As the program attempts to establish a connection with the server, you will see a progress wheel spinning at the right (Fig. 3).
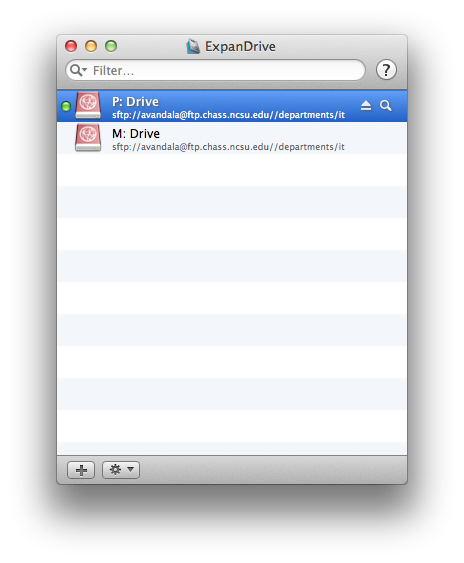
Fig. 4
When a connection with the server has been successfully established, and the drive mapped, a green indicator will appear next to the drive (Fig. 4). To disconnect the drive, click on the Eject button on the right.
Changing the Drive Settings
If your UNITY password changes, you will need to change the drive settings to match your new password.
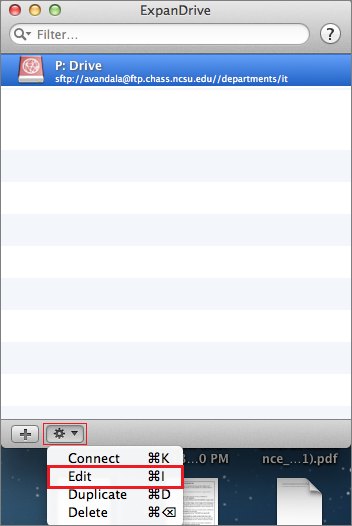
Fig. 5
First, select the drive, then click on the Action button at the bottom of the screen, and select Edit (Fig. 5).
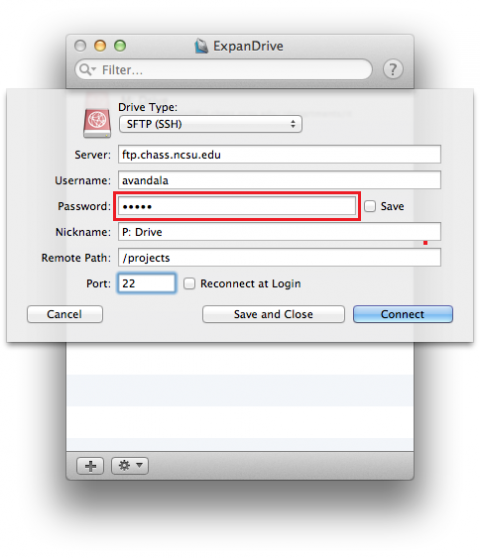
Fig. 6
Then, double-click the password field, and enter in your new password (Fig. 6). Click Save and Close when finished.