How do I map my Y: drive in Mac OS?
Mapping the Y: drive is important when it is necessary to access datasets used in courses held in the college's instructional computer labs. Computers on campus provided by the university and connected to the Wolftech domain automatically map this drive upon login. Computers off campus, as well as those personal computers on campus, may need to map these drives manually. In order to do this, it will be necessary have the university's VPN client software installed on your machine.
It is not possible at this time to use the Macintosh operating system itself to automatically map drives upon each subsequent logon, although you can add individual servers to a list of favorites, which you can access later if needed.
Alternatively, a second method using ExpanDrive is available which would allow you to have the drive mapped automatically every time you log in to your computer, so long as you have a working internet connection. When using this method, however, you will need to make sure that you change your password in ExpanDrive every time your Unity password is changed. Otherwise, it will fail to function properly. To utilize this method, see the corresponding FAQs page here.
Mapping the Y: Drive
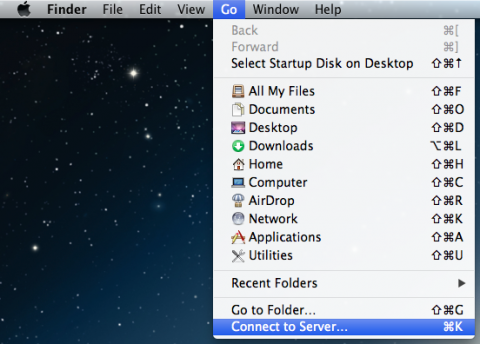
Fig. 1
To map your Y: drive, click on Go in the Finder menu (Fig. 1), and select Connect to Server. Alternatively, you can also use the hotkey combination Command (⌘) + K.
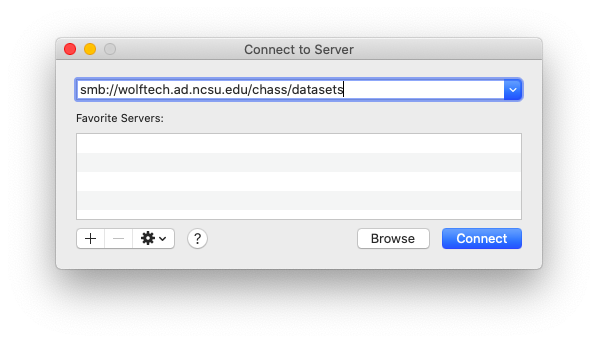
Fig. 2
When the Connect to Server window appears (Fig. 2), in the box under Server Address, first type in: smb://wolftech.ad.ncsu.edu/chass/datasets/
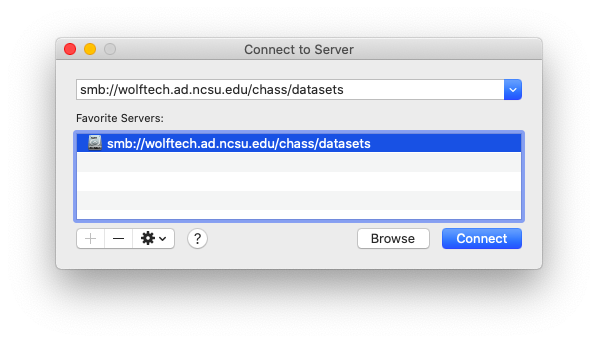
Fig. 3
Note. Although you may have to map the drive again after each subsequent logon, Mac OS can remember servers that you have previously mapped. Simply click on the + button (Fig. 3 above) to add the server path to your list of favorite servers.
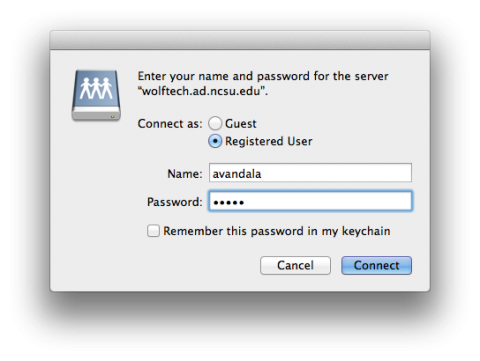
Fig. 4
When the computer establishes an initial contact with the server, you will be prompted to enter your Unity ID and Password (Fig. 4). Do NOT select Remember this password in my keychain, as doing so may damage your permissions. When you have entered your login information, click Connect to map the drive.
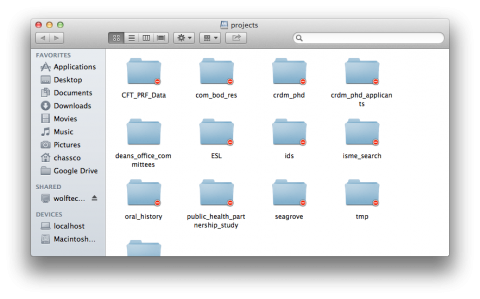
Fig. 5
The Y: drive should now be mapped on your computer, and its contents displayed in a new Finder window (Fig. 5).
Notes
MacOS does not make it obvious where a network file share is mapped by default. Here are some tips to make it easier to find the files if you happen to close the Finder window.
Configure Finder to show connected file shares on the desktop
Open a Finder window and click on Settings under Finder in the Menu Bar.
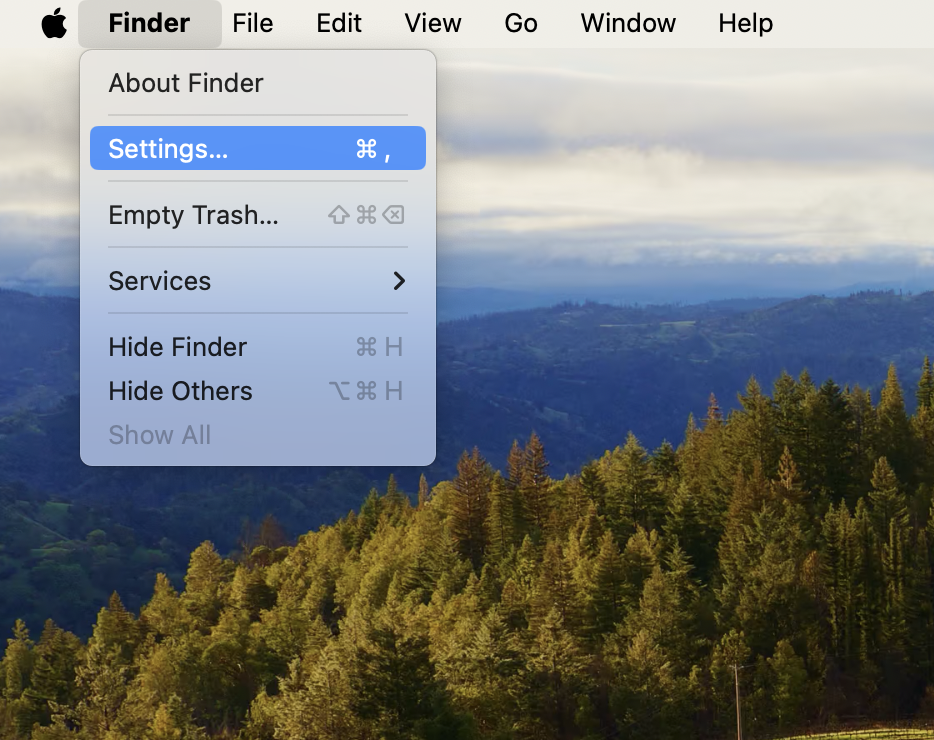
Fig. 6
In the Settings dialog, check the box next Connected Servers to have a shortcut automatically added to the desktop whenever a file share is mapped.
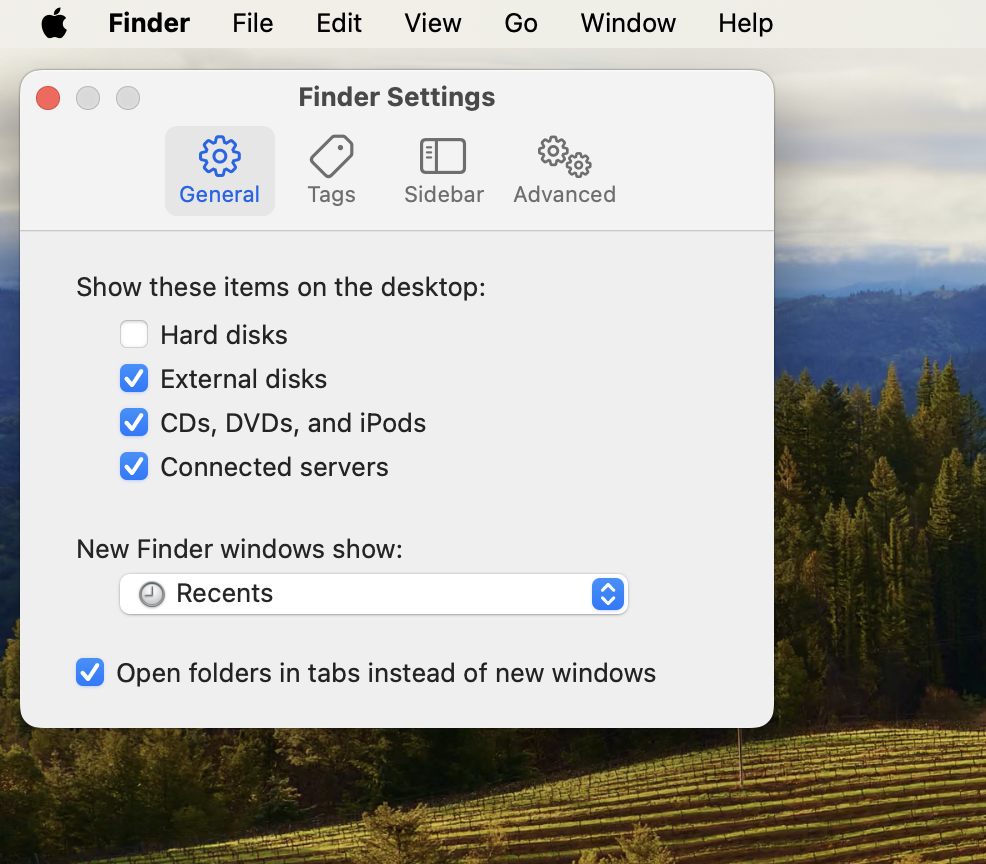
Fig. 7
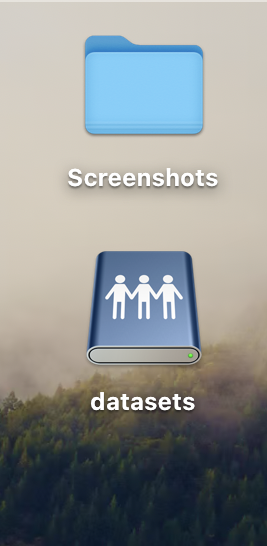
Fig. 8
Use "Go to Folder"
Open a Finder window and click on "Go to Folder" under Go in the Menu Bar.
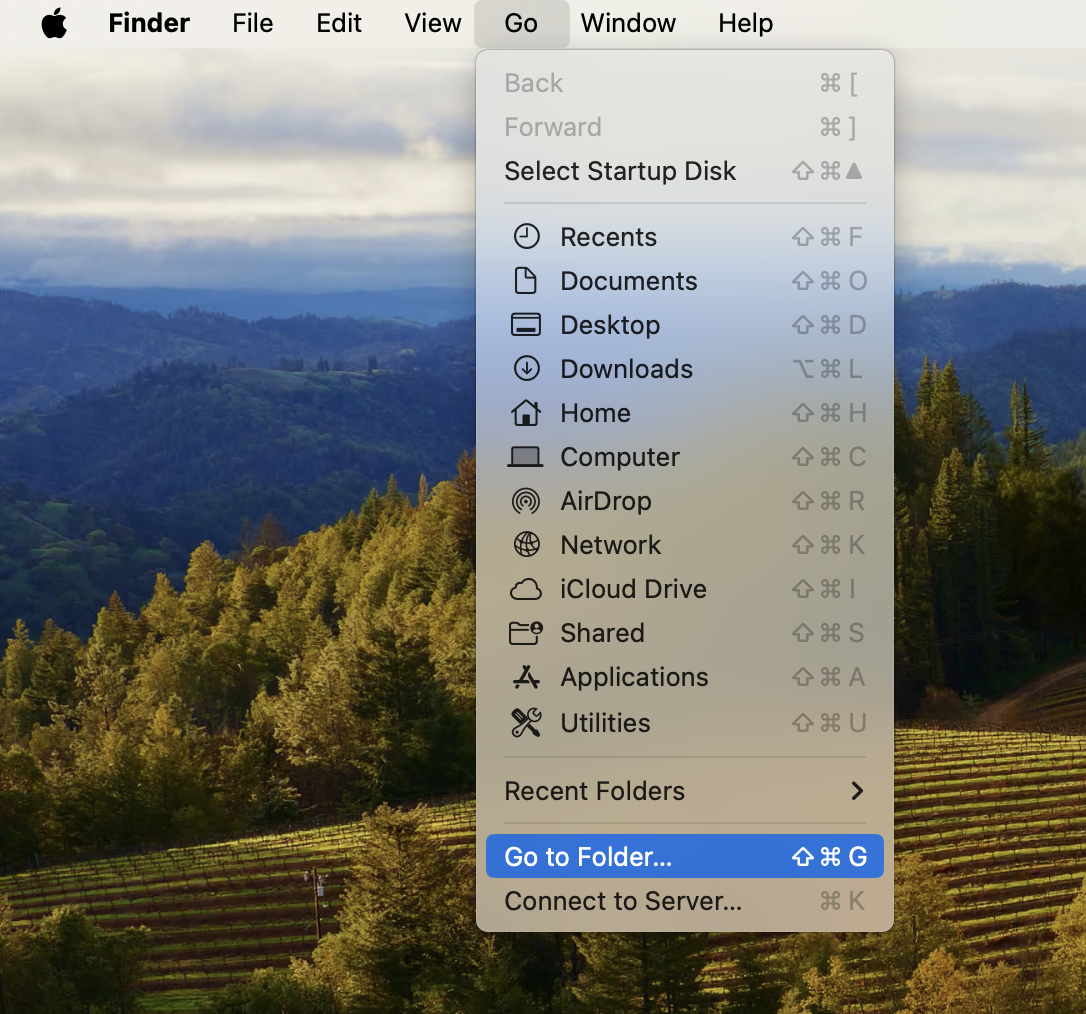
Fig. 9
Type "/Volumes/datasets" in the dialog box and hit the return key.
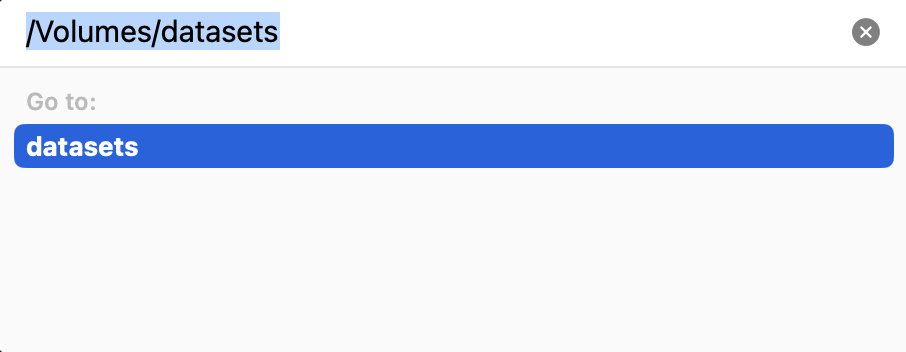
Fig. 10
Referencing files by path
If you need to reference files by path in a program, you start with "/Volumes/datasets/" and separate each directory leading to the desired file with a forward slash (/). For example: "/Volumes/datasets/ENG101/project1/rubric.pdf"
Some applications allow you drag and drop a file to the prompt where you need a file path and MacOS will automatically add the path for you.