Microsoft PowerPoint 2013 Tutorial
Tutorial Main Menu | Training Homepage | Slide Layouts
Section 1: Using Slide Design Templates
This section of the tutorial will cover slide design templates, which are preformatted themes, complete with their own backgrounds, font sizes and styles, as well as color schemes. Here, you will learn how to use these templates, as well as how to customize them to your liking.
Choosing Templates
Choosing a template in PowerPoint is easy, because it is the first thing that you are prompted to do when you open the program (see Fig. 1-1 below). Automatically, you will be taken to the New portion of the File screen, where you are prompted to choose among the various templates and themes provided. If none is to your liking, you can use the search tool to find and download more from Microsoft, provided you have an active network or internet connection.

Fig. 1-1
To choose a slide template among the options provided, simply click on it. For the purpose of this tutorial, we will use the Slice template.

Fig. 1-2
Now you will be given the option of selecting a preformatted color scheme for the template that you have created. We will be choosing a red background for the purpose of this tutorial. To see what each kind of slide would look like, click on the left and right arrows on either side of More Images. When finished, click Create.

Fig. 1-3
PowerPoint will then create the first slide, which happens to be the title slide. Type in the title of your presentation, and if needed, a subtitle.
Changing and Customizing Templates
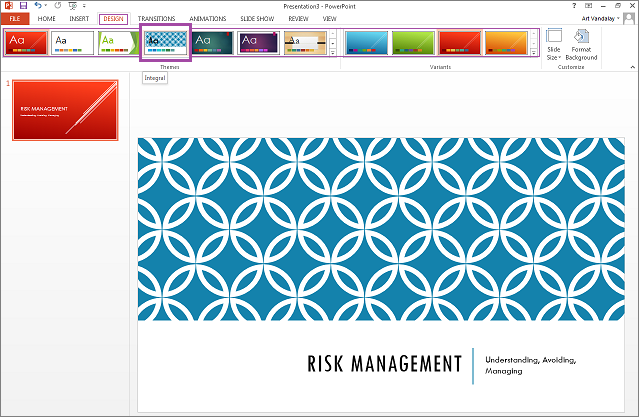
If you end up not liking the template that you've chosen, you needn't discard what you've worked on already. You can simply choose another from the menu at the top, and it will alter all your text accordingly, changing the color, font, and position without altering its content.

Fig. 1-4
To change your template, click on the DESIGN tab on the ribbon menu. Hover your mouse cursor over a template, and PowerPoint will give you a preview of what it will look like, giving you the chance to make a comparison with what you originally chose (the first template is displayed in the top left corner of the screen). Click the left mouse button on the new template to apply it to your presentation.
If on the other hand, you like the template but simply want to tweak it a little bit, that can be done too. For instance, you can format the background to be a different color or design.

Fig. 1-5
Clicking on the DESIGN tab on the ribbon menu, select Format Background, and customize your background. You can change the gradient or color, or even use a picture as the slide background.
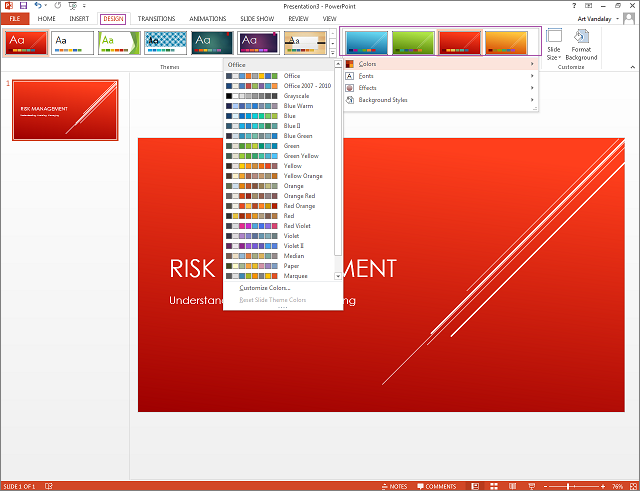
In addition, you can also change the colors, fonts, effects, and background styles of your presentation.

Fig. 1-6
Clicking on the DESIGN tab, locate the  icon to the right of the screen below the different slide variants. Click on it to reveal the drop-down menu, and customize your presentation using the options provided.