Microsoft PowerPoint 2013 Tutorial
Slide Layouts | Tutorial Main Menu | Training Homepage | Editing/Managing Media
Section 3: Editing and Managing Text
Adding and managing text in PowerPoint is very simple. Essentially, all text in PowerPoint is contained within floating text boxes. In this section, we will cover how to edit and manage the text in your presentation.
Adding Text

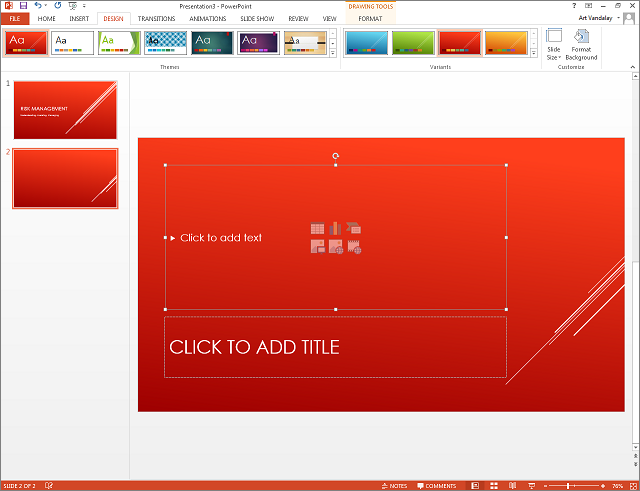
Figure 3-1
To add text to your slides, simply click and type the text into the appropriate box. The text entered will take on the style and format of the sample text already in the text boxes.
Editing Text
Although the text in each box is preformatted, it can be changed. It is important to remember, however, that the formatting that you apply to any particular text box will not be applied to another. Each one must be formatted separately.

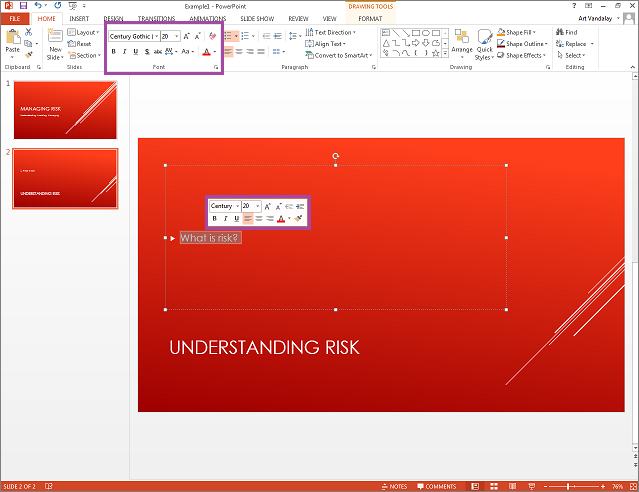
Figure 3-2
To edit already existing text, simply triple-click on the text you would like to edit. Once the text is selected, there are two ways you can format it. The first is to use the formatting box that appears right beside the selected text. The second is to utilize the options in the Font group of icons, under the HOME tab in the ribbon menu, which are slightly more varied than the pop-up box.
The text boxes are situated on top of each slide, and as such they can be moved around, re-sized, or deleted. Because they float on the slide itself, it is not possible to add text directly to the slide as if it were a Word document. Within the context of the text box, however, the contents behave as they would in a word processor.
Quickly Changing the Font Size
Although you can customize your text, as shown above, in the same way as in a word processor, sometimes it is necessary to quickly make your text larger or smaller.

Figure 3-3
To quickly change the font size, triple-click on the text in the text box to select it. Then, locate the increase and decrease text options under the HOME tab, located in the Font group of icons in the ribbon menu. To incrementally increase the size of the selected text, click the  icon. To decrease it, click the
  icon.
icon.
Quickly Indenting Text
In your presentation, it will more than likely be necessary that some slides will take on an outline format. To that end, PowerPoint 2013 allows you to quickly increase or decrease the list level of each bullet in your slide by increments.

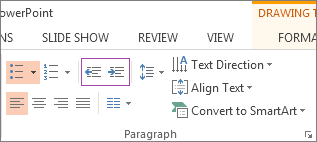
Figure 3-4
To quickly change the indent level of your slide text, select the text, and locating the Increase and Decrease List Level icons under the HOME tab in the Paragraph icon group in the ribbon menu, click on the  icon to decrease the list level. To increase it, click on the
  icon.
icon.
The example below demonstrates what text looks like when it is indented. When the list level is increased, it looks like the selected text. The text above it is what the text would look like if the list level was decreased again.

Figure 3-5