Microsoft PowerPoint 2013 Tutorial
Editing/Managing Text | Tutorial Main Menu | Training Homepage | Using Animation
Section 4: Editing and Managing Media
In an increasingly media-driven world, graphics, video, and audio, in addition to tables and charts, have become more and more common in presenting information. This section of the tutorial will cover how to edit and manage media in your presentation.
Inserting a Media-Ready Slide
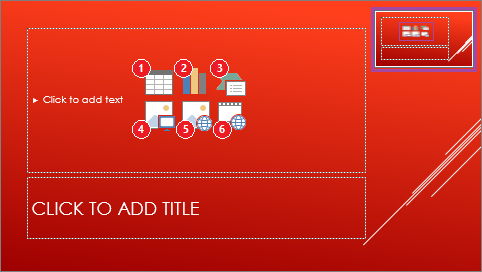
Fig. 4-1
To insert a media-ready slide into your presentation, click on New Slide under the HOME tab (the text with the arrow, not the icon itself), where you select a particular slide template that contains content (see the highlighted areas in the above example). Alternatively, if you just want a plain slide capable of producing media (rather than a certain kind of media such as a panoramic photo, side-by-side comparison, etc.), then simply click on the icon above New Slide.
Different Kinds of Media
There are six different kinds of media that you can insert into your presentation from the outset. Here, we will go over them, using the example slide above as a reference. Keep in mind that these six options will be greyed out until you place your mouse cursor over them. To insert any of these options, simply click on the icon.
1. Table. Inserting a table helps you to present data in an organized manner within your presentation.
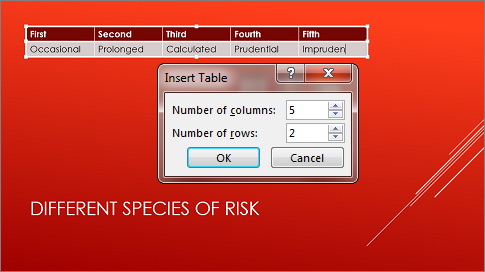
Fig. 4-2
Clicking on the (1) Table option will bring up the Insert Table option box. Indicate how many columns and rows you would like in your table, and then click OK. Once your table is entered, you can enter your text, and format it just like any other table.
2. Chart. Inserting a chart allows you to present data in a more visual manner.
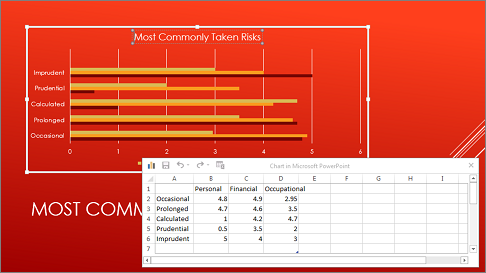
Fig. 4-3
Clicking on the (2) Chart option will bring up the Insert Chart window. Choose from among the variety of options, and then click OK. Once the chart is inserted, you may enter the fields with their corresponding data in the windowed table that appears.
3. SmartArt Graphic. SmartArt graphics are another unique method of displaying information and the relationships between words or sets of data.
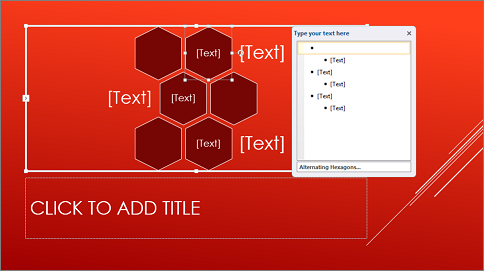
Fig. 4-4
Clicking on the (3) SmartArt Graphic option will bring up the Choose a SmartArt Graphic window. Choose from among the variety of options, and then click OK. Once the graphic is inserted, you may enter the text of the graphic.
4. Pictures. With this option, you can insert pictures from your hard disk into your presentation.
5. Online Pictures. If you have an active internet or network connection, you can use this option to browse Microsoft's online image database, or search for images using Bing within the the PowerPoint program itself.
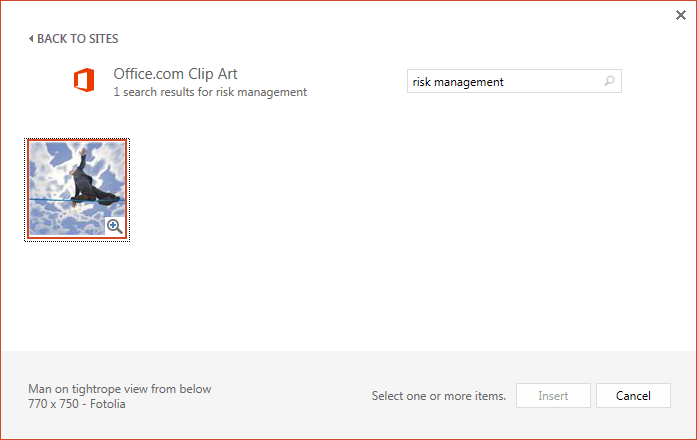
Fig. 4-5
6. Video. Selecting this option allows you to insert a video from your hard disk, link to a video on Bing, or embed a video from a web site.
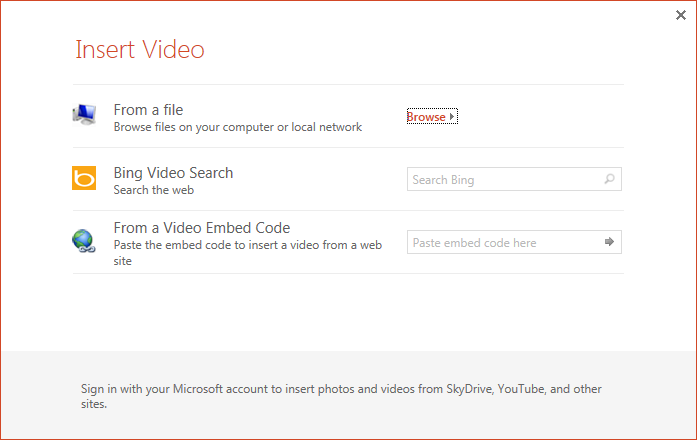
Fig. 4-6
Inserting Other Media
In addition to the six types of media covered above, PowerPoint 2013 is also able to insert shapes, audio, screenshots, photo albums, and objects that are also common to Microsoft Word.

Fig. 4-7
Clicking on the INSERT tab on the ribbon menu will enable you to enter many more objects into your presentation than are available from a content slide. On the left hand of the ribbon menu, you will see some of the options that have already been covered. In addition to these, you will also see Screenshot, Photo Album, and Shapes.
Screenshots
Clicking on Screenshots will allow you to insert images of open programs into your presentation.
Photo Album
The Photo Album option creates a series of slides from pictures taken from your hard disk.
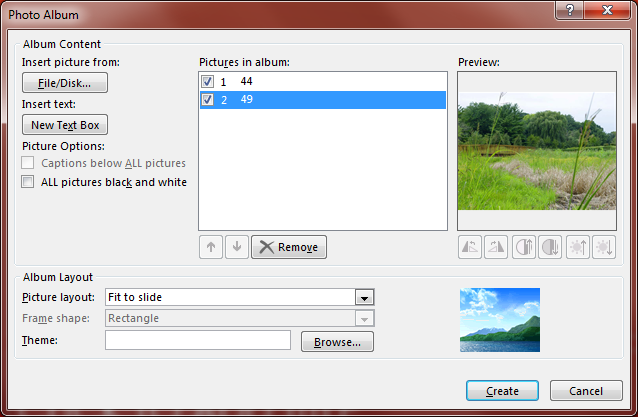
Fig. 4-8
To create a photo album in your presentation, click on the INSERT tab, and select Photo Album under the Images group of icons on the ribbon menu. A window will appear, where you will be able to select pictures from your computer to insert into the album. Click on File/Disk to retrieve them, and use the arrow keys to order them to your liking. You can also choose the layout of each picture under the Album Layout group of options at the bottom. Before clicking on Create, make sure that each of the pictures you would like inserted have a check mark beside them.
Shapes
Click on Shapes to insert an AutoShape into your presentation. As with text boxes, these function in the same manner in PowerPoint as in Word.
Audio
PowerPoint 2013 enables you to insert audio into your presentation as well as video.
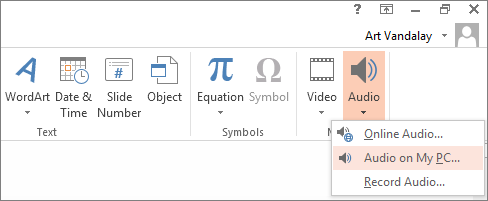
Fig. 4-9
To insert audio into the current slide, locate the Audio option after clicking on the INSERT tab on the ribbon menu. Clicking on the icon will reveal a drop-down menu, where you will be given the option to select an audio clip from the Web, your hard disk, or alternatively to record an audio clip from scratch.
Managing Media
Once you have your image, video, audio, etc., inserted into your slide, you're going to need to know how to integrate it successfully into your presentation. Since this is especially the case for video and audio, we will use an inserted audio clip as an example.

Fig. 4-10
By default, anything you insert into your slide from scratch (that is, not using a slide template) will appear in the center of your slide. It is important to make sure you keep track of where your media has been placed, so you will be able to play it when the time comes.
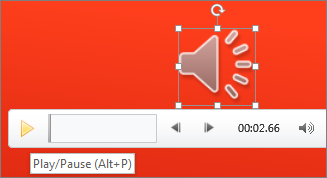
Fig. 4-11
An audio clip can be dragged around the slide like any other object, and its icon can be re-sized, to be larger or smaller, if necessary. Simply click on it to select it, and re-size it to limit its visibility. Once you have your audio clip where it is sufficiently out of the way, you can preview the file by clicking on it and pressing the play button on the media bar that appears just under it.

Fig. 4-12
In the presentation itself, it will show up where you left it. Simply click once (you'll see the pointing hand), and the file will begin playing.
If you don't want a sound icon appearing in your presentation, there is a way to still play the file and not have its icon show up on the slide (at least, not when you're presenting--it will still appear when editing the slide in PowerPoint).
Advanced Media Management
If you do not want the media icon to appear at all, you can set the media's icon to be invisible during the presentation, or play in the background. You can also trim your media so that it only plays a specified section of an audio or video file.

Fig. 4-13
To access these options, simply click on the media file in the slide view. When the Audio Tools appear on your ribbon menu, click on Playback.
From this menu, you can perform a variety of tasks by which you can manage the media file in your slide, and customize its playback options. Again, for the purposes of this presentation, we will use the example of an audio file.
Playback Options
1) Play. This option allows you to preview your audio in the slide view.
2) Trim Audio. Selecting this option gives you the ability to trim the audio, such that it only plays a certain portion of the whole file.
3) Fade Duration. Allows you to make the audio fade in and/or fade out.
4) Volume. Set the volume for the audio for playback during the presentation.
5) Start. By clicking on the drop-down menu, you can tell PowerPoint when the audio should start after arriving at that particular slide in your presentation. You can set it to play on the click of the mouse, or automatically.
6) Play Across Slides. This option will cause the audio file to play even after you move to the next slide (the default setting is to contain the audio playback to the current slide).
7) Loop until Stopped. Clicking this check box will put the audio file on a continuous loop once it begins playing.
8) Hide During Show. This hides the audio file icon, so that it will not be visible on the slide while the presentation is in progress. If you do not have the audio file set to play automatically, this option will prevent you from clicking on its icon.
If you want the icon to be hidden during the presentation, as well as have the ability to click on a particular object in order to make it play on command, you will need to proceed to the next section on Animation. With the animation feature, PowerPoint can link a file to an object such as a text box or a picture already on your slide. Once linked, the audio file will be invisible during the actual presentation.