Microsoft Word 2013 Tutorial
Tutorial Main Menu | Training Homepage | Page Numbers
Section 1: Headers and Footers
Whether you’re writing a paper, article, lab report, or even a book, more often than not you’re going to need headers and footers. This tutorial will show you how to insert them into a document, as well as how to add different headers and footers for different sections of the same document.
Adding a Header
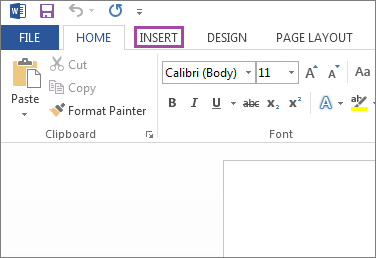
Figure 1-1
Step 1. To add a header, first click on the INSERT tab at the top of the screen, located just above the ribbon menu.

Figure 1-2
Step 2. The icons and options on the ribbon menu having changed, click on the Header option, located to the right of the Comment menu icon.
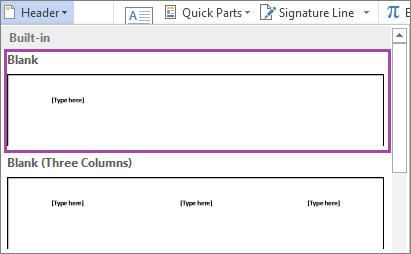
Figure 1-3
Step 3. A drop-down menu appears, presenting the different options for the various kinds of headers. For the purposes of this tutorial, we will utilize the standard "blank" header.

Figure 1-4
Step 4. Having now accessed the header area of the document, simply begin typing to insert text into the header. For formatting options (i.e., to change the font, style, alignment, or color of the text), click on the HOME tab.

Figure 1-4a
Tip. To access the Font window, click on the arrow in the right-hand corner of the "Font" icon group in the ribbon menu, or press Ctrl+D on your keyboard.

Figure 1-5
Step 5. When you want to return to the body of the document, simply double-click on the area below the header. Alternatively, you may click the Close Header and Footer button on the ribbon menu. Note that once you return to the body of the document, the header area of the document is greyed out; however, it will not be greyed out when you print.
Tip. If you want to quickly add a simple header to a document, just double-click on the header area at the top of the page. Click the HOME tab for more formatting options (see Fig. 1-6 below).
Editing a Header
Figure 1-6
Step 1. To edit an already existing header, first double-click on the header area.

Figure 1-7
Step 2. Now that the header area of the document is accessible, triple-click on the header text. A formatting box will appear next to the text, allowing you to format it. If you want to do more than change the font, size, color, etc. (such as the alignment of the text), click on the HOME tab at the top of the screen to reveal more formatting options (see Fig. 1-4 above).
Adding a Footer
Adding a footer in Word 2013 follows the same process as adding a header.
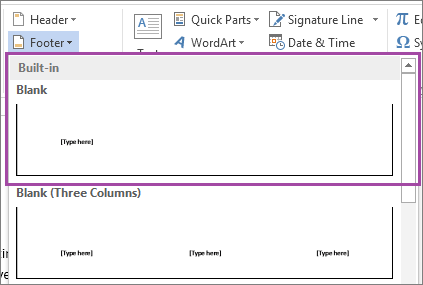
Figure 1-8
Step 1. To add a footer, click on the INSERT tab in the menu at the top of your screen (see Fig. 1-1 above). Then click on the Footer option, which will bring up a drop-down menu. Again, for the purposes of this tutorial, we will use the standard “blank” option.
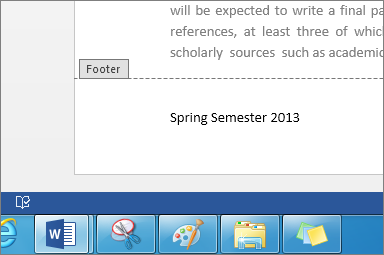
Figure 1-9
Step 2. Now that the footer has been created, simply begin typing. If you want to format the text, triple-click on it, and then click the HOME tab at the top of the screen (see Fig. 1-4 above).

Figure 1-10
Step 3. As with headers, you may exit the footer area either by clicking on the body text of the document, or by clicking the Close Header and Footer button on the ribbon menu.
Alternating Headers and Footers between Sections
It sometimes happens that, when writing a work with several sections a new heading may be needed at the beginning of each part, section, or chapter. By default, however, Word 2013 duplicates the same header and footer on every page unless instructed to do otherwise (see Fig. 1-11 below).
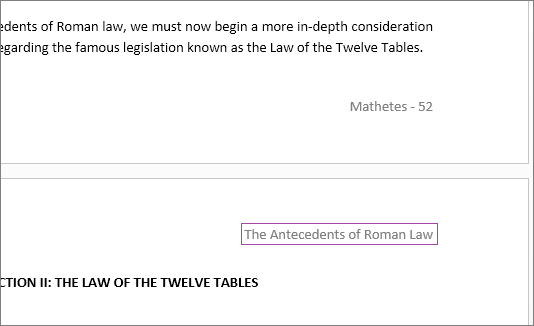
Figure 1-11
This means that if you try to change the header or footer to correspond to another section of your document, Word will automatically change every header or footer in the entire document. For example, suppose you already have a header corresponding to the first section of a paper, and are now starting a new section. If you attempt to type in the title of the new section in the header to correspond with the change in subject matter, all the preceding pages will be labeled with that heading.
Step 1. In order to prevent this from happening, it will be necessary to indicate to the program that a new section of the document has begun. This can be done by utilizing the Page Break and Section Break features of Word 2013, which allows a document to be delineated by pages and/or sections for the purpose of having differing page numbers, headers, or footers. To learn how to do this, see Section 3: Creating Page and Section Breaks.
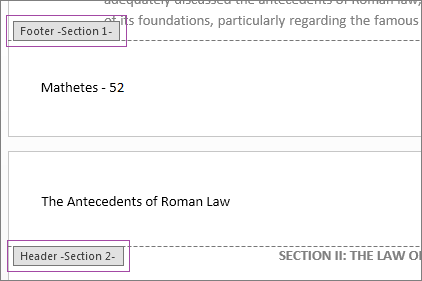
Figure 1-12
Step 2. After a section or page break has been created, double-click on the text of the header. Note that the header tag below and to the left indicates which section of the document this particular heading now falls under (in this case, Section 2).
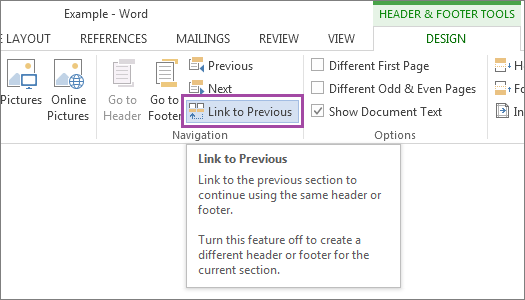
Fig. 1-13
Step 3. Among the options under the Navigation group, the option Link to Previous will be highlighted. Click on it to deselect it. This will allow for the headers in Section 2 to differ from those in Section 1.
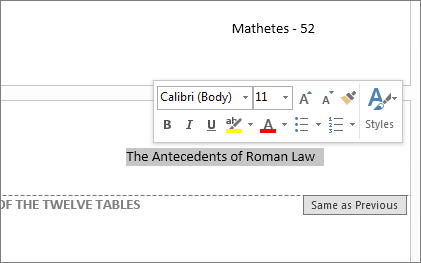
Figure 1-14
Step 4. Triple-click on the header to change the text, and type in the header for the new section. Now the headers for sections 1 and 2 will be different from one another.
Note. The steps above may be followed when formatting footers also.
Eliminating a Header or Footer from the First Page
Occasionally, it will be necessary to remove a header or footer from the first page of a document.
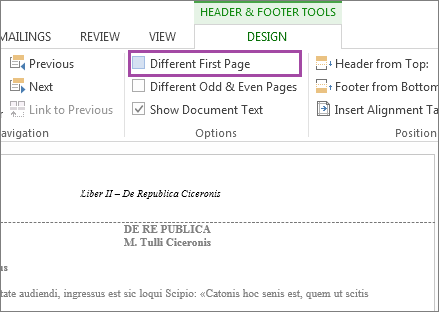
Figure 1-15
In order to do this, double-click on the header area to reveal the Header and Footer Tools (see Fig. 1-6), and click on the check box labeled Different First Page. This will allow for a blank header or a different header for the first page of your document.
