Microsoft Word 2013 Tutorial
Headers/Footers | Tutorial Main Menu | Training Homepage | Page/Section Breaks
Section 2: Page Numbers
Inserting and Formatting Page Numbers | Specialized Page Numbers
The process of creating page numbers is similar to that of headers and footers, and certainly an equally necessary skill in using Word 2013. What follows is an overview on how to use the page number feature.
Inserting and Formatting Page Numbers
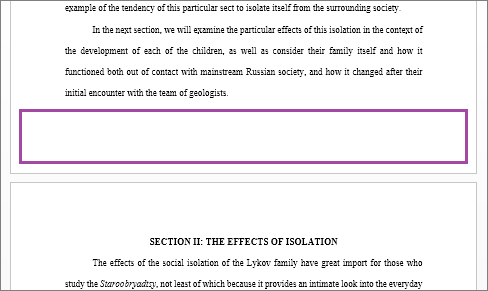
Figure 2-1
Step 1. To insert page numbers, first double-click on the header or footer area of the document.
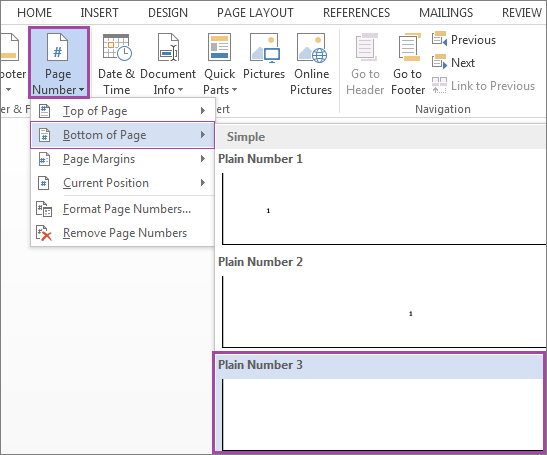
Figure 2-2
Step 2. Then, under the Header & Footer icon group on the ribbon menu, click on Page Number. A drop-down menu will appear. For the purposes of this tutorial, we are going to select Bottom of Page, then Plain Number 3 as the style of page number.
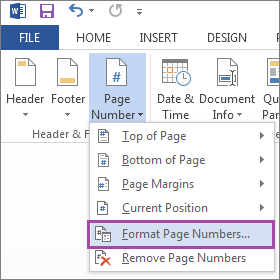
Figure 2-3
Step 3. To format the page numbers, click on the Page Number icon in the ribbon menu, and select Format Page Numbers.
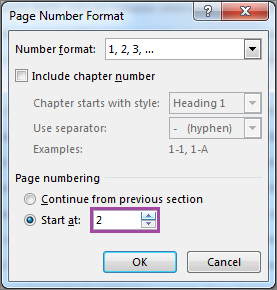
Figure 2-4
Step 4. A window will appear, giving you several options to format your page numbers. Since starting page numbers on the second page is quite common, we will click the up arrow next to the Start radio button, setting it to 2. This, of course, is optional. Click OK. If you want the page numbers to begin on the first page, you won't have to go any further than Step 2.
Tip. Although Arabic numerals are the default setting, you can also use Roman numerals, letters, or have dashes on either side of the page numbers. These options may be accessed via the Number Format drop-down menu at the top of the window.
Creating Specialized Page Numbers
Sometimes it may be necessary to have page numbers indicate both the current page as well as the author's name, or perhaps even the total number of pages.
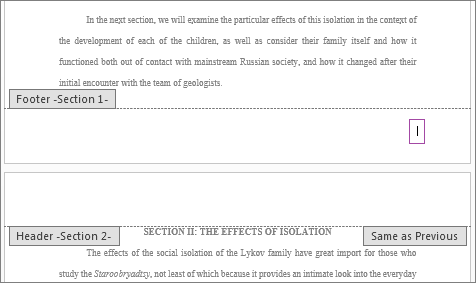
Figure 2-5
Step 1. Double-clicking on the header area of the document (see Fig. 2-1), click on the space where you want to place the specialized page numbers.
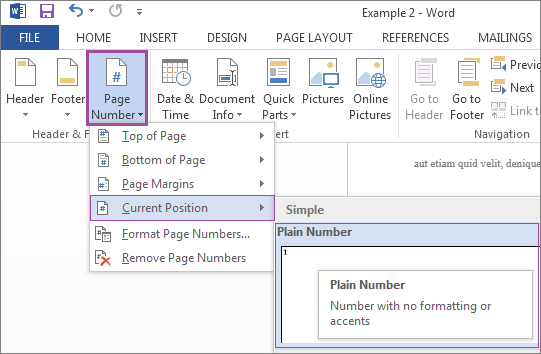
Figure 2-6
Step 2. Then, click on the Page Number icon, and select the Current Position option in the drop-down menu. Again, for the purposes of this tutorial, we will insert a plain page number.
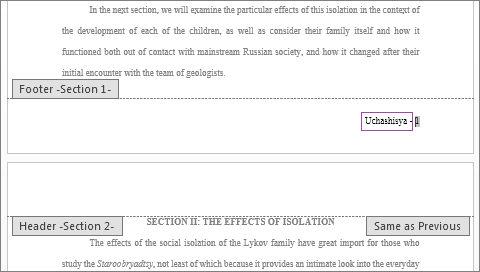
Figure 2-7
Step 3. Once Word has entered the proper page number, you can then type in the text before or after the page number, such as the author. Or, if your document has twenty pages, you could enter "of 20" after the number. For each page, Word will insert corresponding page number, while keeping the rest of the text in place.