PSPP Tutorial
Opening an Existing Dataset | Tutorial Main Menu | Training Homepage | Univariate Analysis
Section Three: Creating a Dataset
Step 1: Entering Variables
Upon opening PSPP, you will see a blank data table. Because no variables have yet been defined, your column headings will all read "var," while the row headings will be ordered numerically.
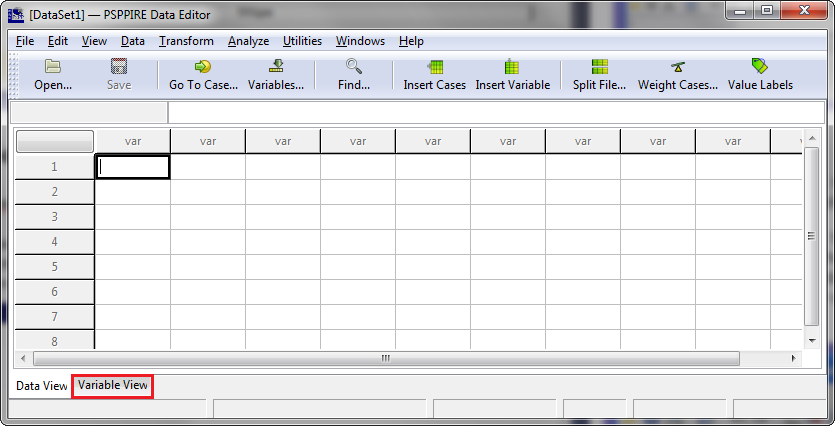
Figure 3-1
In order to enter the variables for your dataset, you will need to switch from Data View to Variable View. You can do this by locating the Variable View tab at the bottom left-hand corner of your screen, and clicking on it.
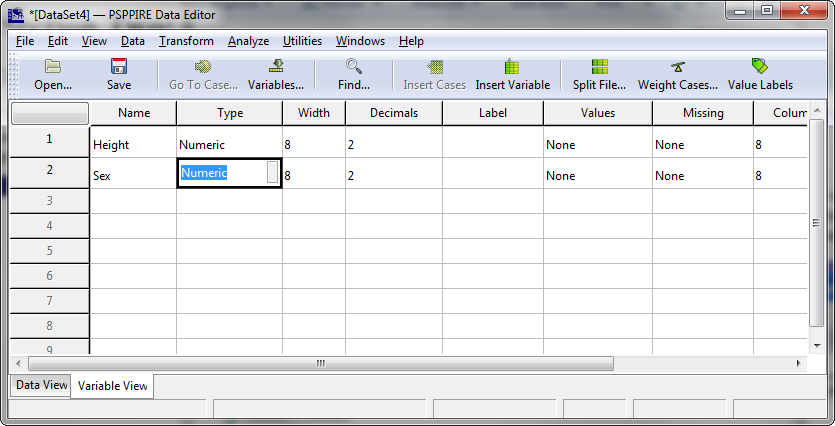
Figure 3-2
Once you are in Variable View, you will be able to enter the variables for your dataset. You can enter names of the variables under the Name column, and press Tab to cause the rest of the fields to propagate in accordance with default settings.
For the purpose of this tutorial, we will create a simple dataset with two variables: the first variable will be (1) height, and the second (2) sex. Click on the first cell under the Name column, and enter "Height." Press Tab, and then click on the second cell under the Name column, entering the variable "Height." Press Tab again. Now the names of your variables have been successfully entered.
Step 2: Assigning Value Labels for Variables
Now you may enter the value labels for your variables. In this instance, there are two values under the variable "sex," namely "male" and "female." In assigning a value label, as the name implies, we are simply associating a label (i.e., "male" or "female") to a particular value (i.e., "1" or "2"). This is similar to how such values might appear on a survey:
|
(1) Height (enter in inches):______ |
In the above example, under the second (2) variable "Sex," the value "1" is assigned the value label "Male," while the value "2" is assigned the value label "Female."
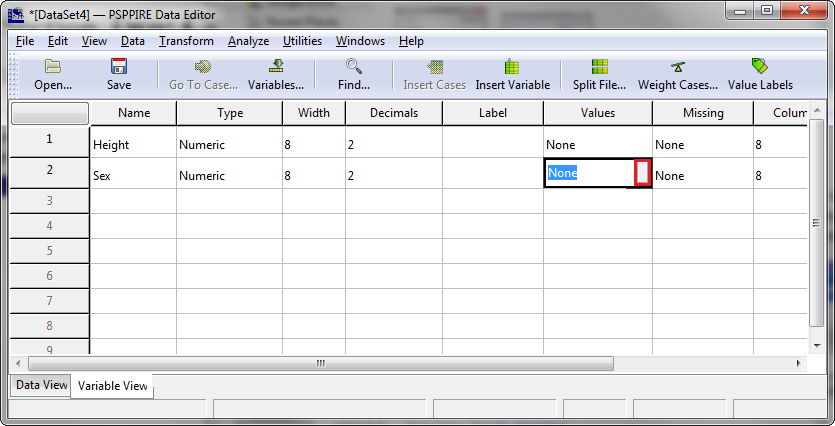
Figure 3-3
To assign values for a particular variable, click on the cell under the Values column, and click on the grey box in the right-hand corner of the cell.
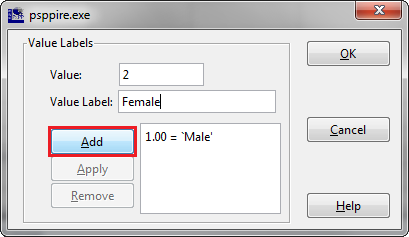
Figure 3-4
A window will appear, prompting you to enter the value and the value label. For the first value label, enter "1" in the value field, and then the first label (in this case "Male") in the value label field. For the second value label, enter "2" in the value field, entering the second label (in this case "Female") in the value label field.
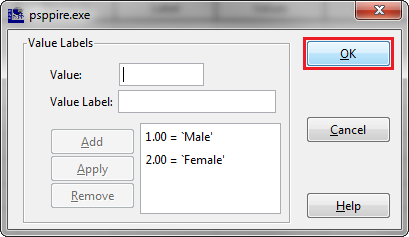
Figure 3-5
After you have finished entering all your value labels, click OK. After returning to the main screen, your Variable View should look like Fig. 2-6 below.

Figure 3-6
Now that the value labels for the variable "Sex" have been properly assigned, we can begin entering our data by returning to the Data View. You can do this by clicking on the Data View tab at the bottom left-hand corner of your screen.
Step 3: Entering Data
After clicking on the Data View tab, you will return to the same screen that appeared when you first opened the program, except now instead of the first and second columns having the heading "var," they will have as headings "Height" and "Sex" respectively.

Figure 3-7
Now you can begin entering your data. In this example dataset, we are entering our data in inches under the first column, and the values "1" and "2" for "Male" and "Female" under the second column.
Step 4: Saving a Dataset
Now that you have entered your data, you can save your dataset.
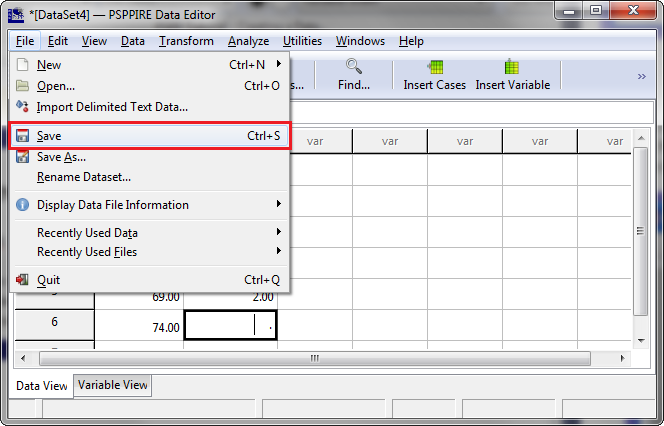
Figure 3-8
To save, open the File menu and click on Save.
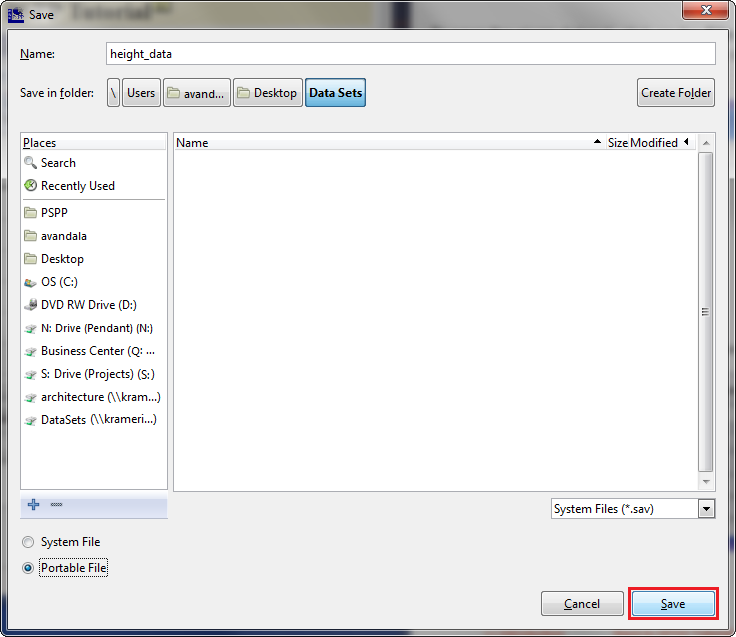
Figure 3-9
Navigate to the location where you want to save your dataset, and then click on the Save button.

PSPP Tutorial by CHASS IT is licensed under a Creative Commons Attribution 3.0 Unported License.
Based on a work at it.chass.ncsu.edu/training/pspp.