BlueGriffon Tutorial
<< Tools and Preferences | Complying with the Americans with Disabilities Act >>
Customizing the BlueGriffon Toolbars
Some functions in BlueGriffon you will use more than others, whereas some may not be used at all. It may be neccessary, then, to move, add, or even remove, some functions from the BlueGriffon toolbars.
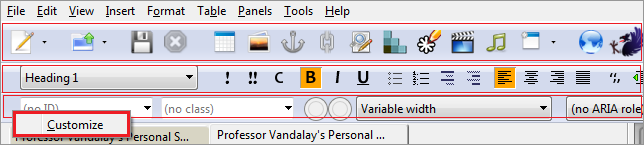
Fig. 16-1
There are three main toolbars at the top of the BlueGriffon window, one larger, and two smaller. In addition to the, more toolbars may be added, or the ones already existing may even be taken away. To customize any of the three, simply right-click on one of them, and select Customize (Fig. 16-1).
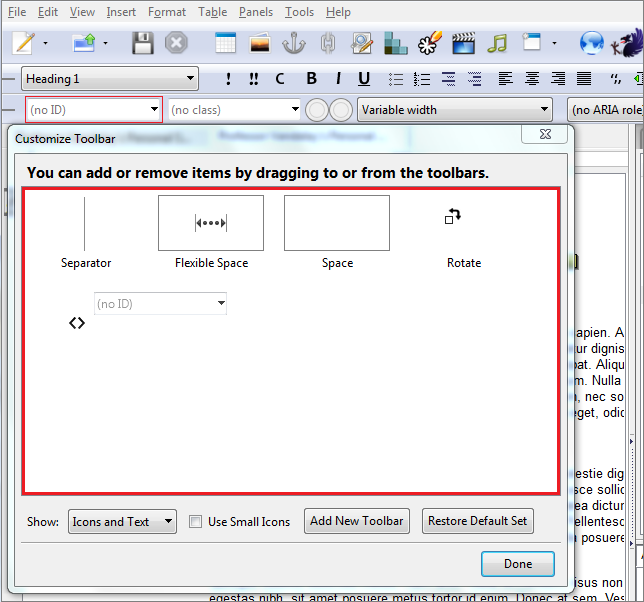
Fig. 16-2
When the Customize Toolbar window appears (Fig. 16-2), you can remove a particular element of or function on the toolbar by left-clicking the mouse button on it, and dragging it into the white space in the window. Conversely, you can add elements from the window by left-clicking on them, and dragging them onto the toolbar. Elements already on the toolbar can also be moved around, to a different place on the toolbar or to another one entirely, also by clicking and dragging.
From this window, you can also customize whether both icons and text are displayed, or either may be shown to the exclusion of the other. You can make the icons smaller, add a new toolbar, or restore the defaults if in the process of customization a mistake is made.
You have now reached the end of the BlueGriffon Tutorial.
<< Tools and Preferences | Complying with the Americans with Disabilities Act >>
[Back to Top]