BlueGriffon Tutorial
<< Creating the Site Directory | Paragraph and Text Formatting >>
The Home Page
Now that we have created a default directory for our new site, we can create our home (or "index") page. Although there is an option in BlueGriffon to start with a blank page, for the purposes of this tutorial, we're going to use the new document wizard.
Creating the Home Page
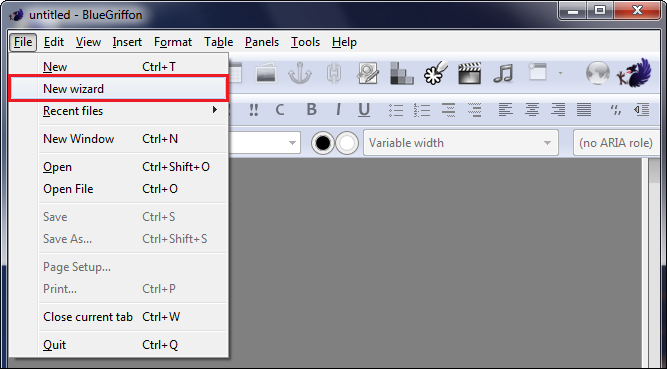
Fig. 2-1
First, open the BlueGriffon program, and from the File menu, select New wizard (Fig. 2-1).
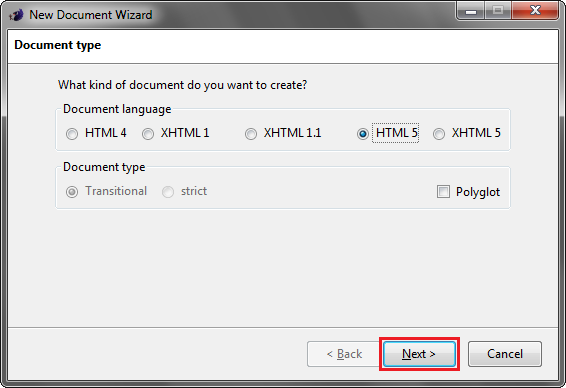
Fig. 2-2
The new document wizard will then appear, prompting you to select what kind of HTML document you would like to create. The document type we will be using will be the default HTML 5 option (Fig. 2-2).

Fig. 2-3
Next, the wizard will ask you to enter the general document properties (Fig. 2-3). Type in the title of your webpage, and if you wish, the author. All the other fields may be left blank, if so desired. Click Next to continue.
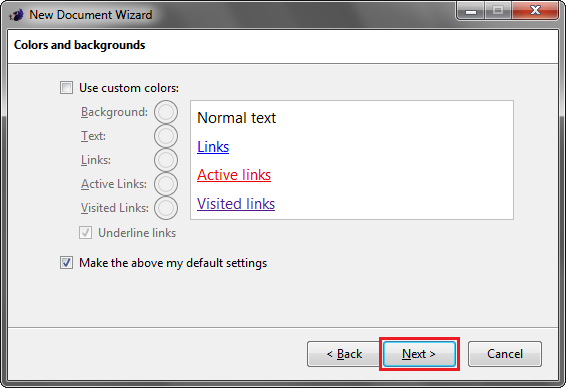
Fig. 2-4
Then you will be prompted to enter your color and background settings (Fig. 2-4). Since you can change these at any time, it is best to leave these at their default settings initially. Click Next to continue.
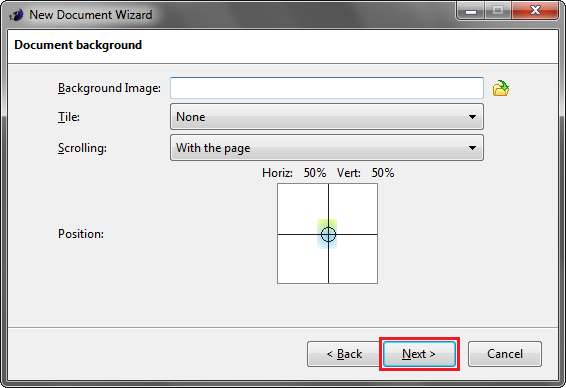
Fig. 2-5
You will also have the option of setting a background image for the HTML document (Fig. 2-5). For our purposes, though, we will leave it blank. Click Next to continue.
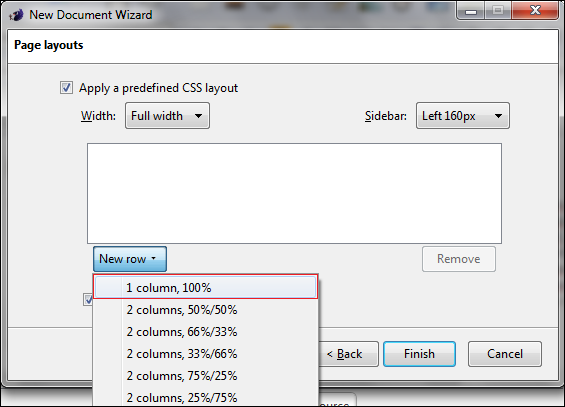
Fig. 2-6
In the page layout section of the wizard, click on New row, and select 1 column, 100% (Fig. 2-6).
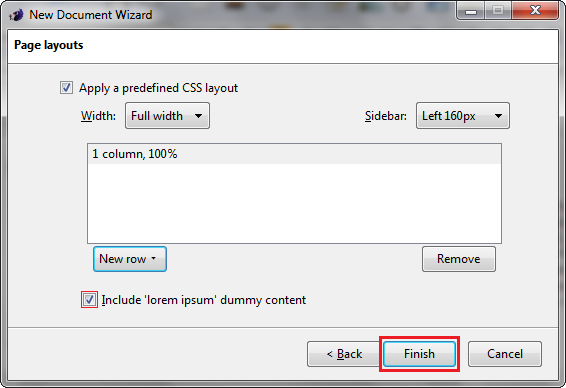
Fig. 2-7
After adding the column to the page layout, click the check box beside Include 'lorem ipsum' dummy content (Fig. 2-7). This will automatically insert filler text into your page, so you can more easily see where particular parts of the page begin and end. Click Finish to create the page.
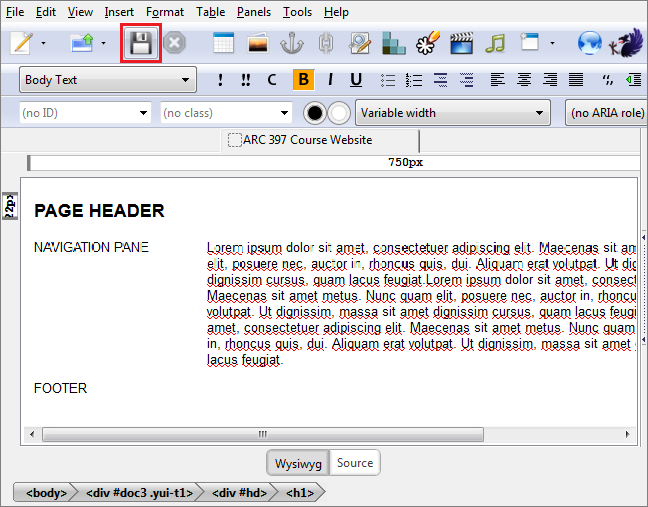
Fig. 2-8
Now the first page has been created, with a page header, navigation pane, body text, and footer. To save, click on the Save icon in the toolbar (Fig. 2-8).
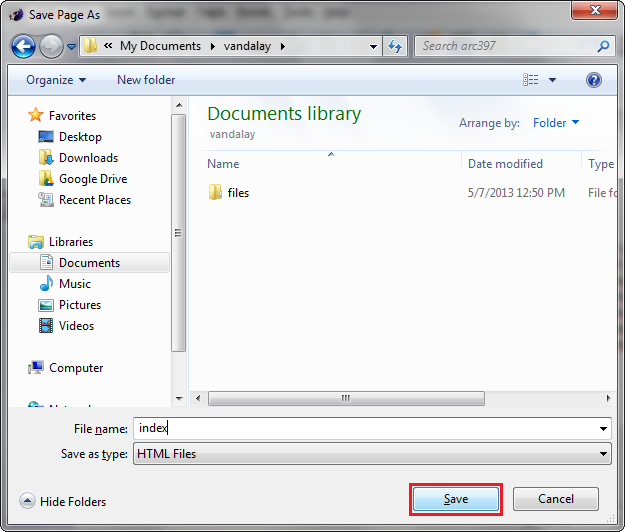
Fig. 2-9
Navigate to the main directory which was created in the last section on Creating the Site Directory. In the File name box, we will call the page index (Fig. 2-9). It is a good practice to name the main page of every site in this way, in order to make it easier to find it when using a web browser. When you have finished typing, click Save.
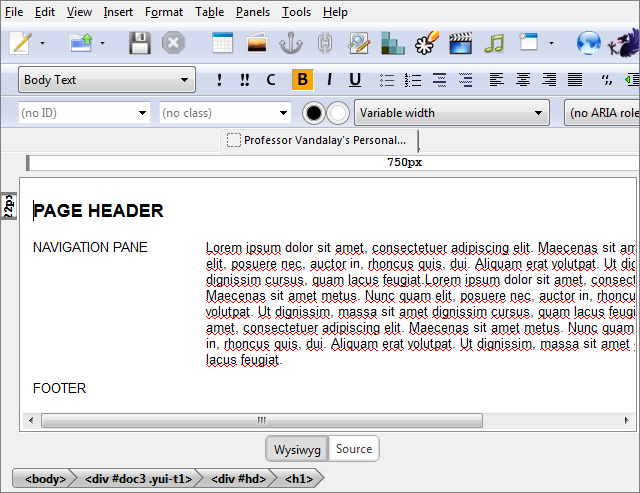
Fig. 2-10
The figure above (Fig. 2-10) shows what the template of the home page should look like with the filler text inserted.
Editing the Home Page
Now that we have created the Home Page, we can begin editing, replacing the faux Latin with meaningful text. It is important to remember that the substance of any web page is its content, and so any extensive formatting of the page (such as background, colors, fonts, etc.) should come afterwards.
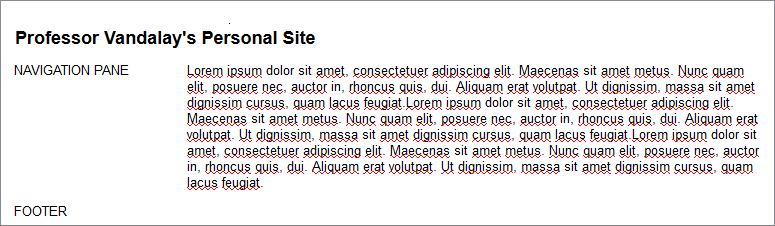
Fig. 2-11
The first thing to be replaced will be the page header. Select the filler text, and type in the name of your site (in this case "Professor Vandalay's Personal Site," see Fig. 2-11 above).
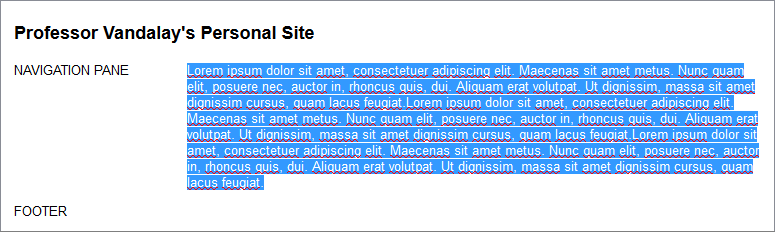
Fig. 2-12
Next, we will replace the body text (the faux Latin that BlueGriffon has inserted), by first selecting it (Fig. 2-12) and replacing it with the site's content. For the purposes of this tutorial, we will only enter a brief introduction to the site, in order to provide an example.

Fig. 2-13
After that, we will highlight the footer (Fig. 2-13), and enter some rudimentary information about the website.
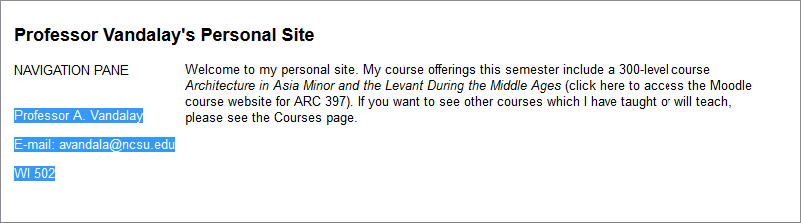
Fig. 2-14
Although you can provide whatever information you would like in the footer, in our example we will enter the instructor's name, office hours, and location. You will notice that there is a certain degree of separation between the three lines of text. In order to change this, we will need to select all three lines (Fig. 2-14), and indicate to the program that we want the paragraph setting for all three to be set to Body Text.
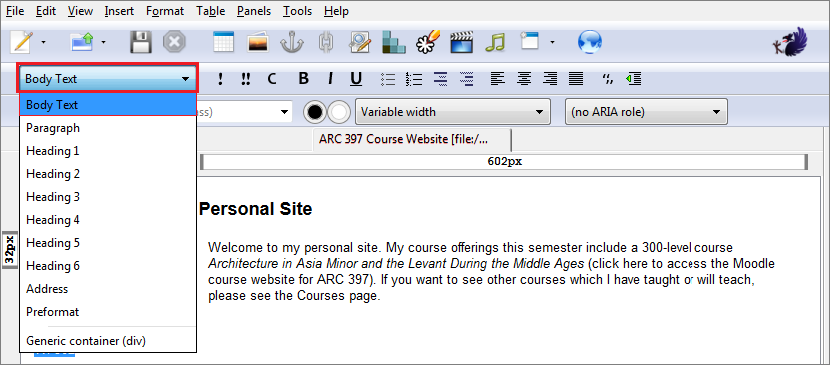
Fig. 2-15
After selecting the footer content, click on the paragraph format drop-down menu, and reselect Body Text (Fig. 2-15).
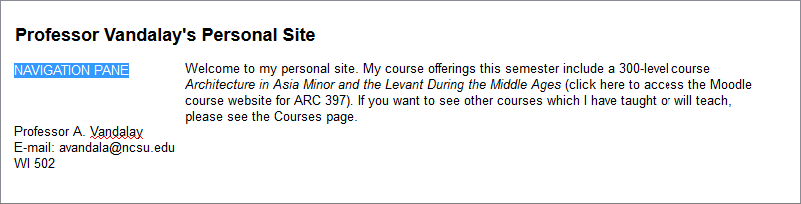
Fig. 2-16
Now only the navigation pane remains to be edited. Begin by selecting the text itself (Fig. 2-16).

Fig. 2-17
Then, type the names of each of your subsequent pages, which will all be linked from the Home Page. After that is finished, point your cursor and click at the beginning of the body text, pressing Enter to insert a space above it (Fig. 2-17). This will make space for an image, which we will insert next.
After inserting a small image above the body text (see Inserting an Image below), we will simply center the image without any text wrapping, since governing how the text is enclosed around an image requires HTML (we will return to the subject of text-wrapping in a full treatment of images later).
Inserting an Image
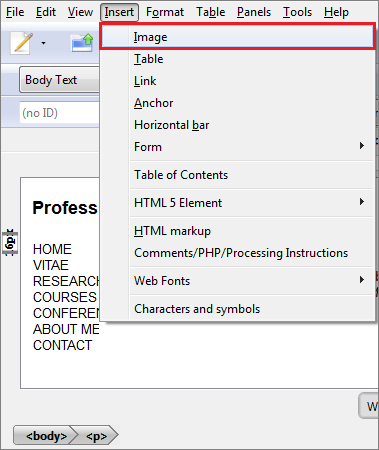
Fig. 2-18
First, we will click on Insert in the main menu, and select Image (Fig. 2-18)
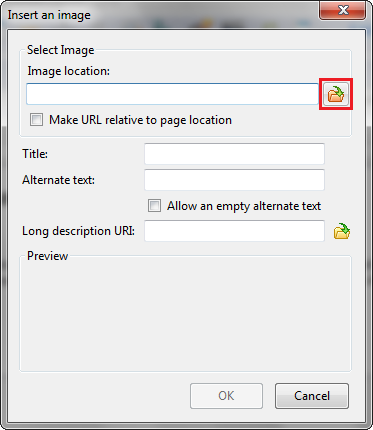
Fig. 2-19
When the Insert an image window appears, click on the Select Image icon (Fig. 2-19).
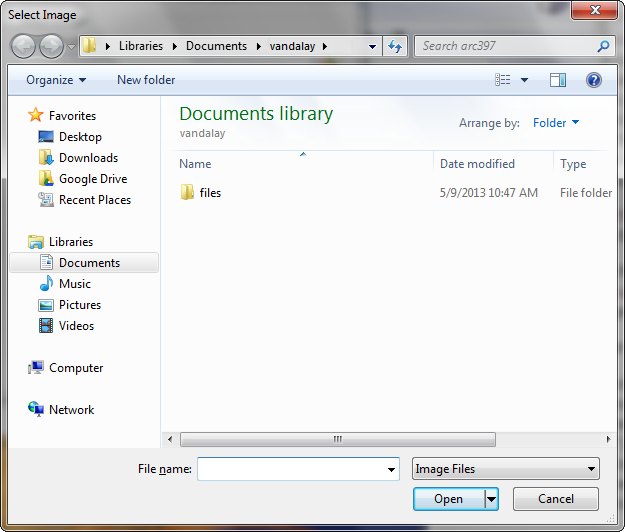
Fig. 2-20
In the site's main directory, double-click on the files folder, where all of your site's media will be stored (Fig. 2-20). This includes images, audio and video files, documents, lecture notes and presentations, etc., so that all of your embedded and attached content is located in one accessible location.

Fig. 2-21
The Select Image dialog window will then appear. In the above example (Fig. 2-21), two relatively small images that have been edited specifically for this particular website, and placed in the files folder in the main site directory. To follow along, you can select any picture, so long as it is small enough not to take up too much space. In making your actual site, of course, you will want a picture that is related to the content of the site. After selecting an appropriate image, click Open.
Note. Unless you are working on a page that is specifically for images, you will want to keep the images as small as possible, maximizing visibility while minimizing clutter. You want the images to relate to your page's content, while at the same time making sure the image doesn't contort the text, making it difficult to read. This is particularly true at this point, since we have not yet covered how to make text wrap around images, which is a bit tricky in that it requires a little HTML knowledge (as mentioned above, it will be covered later).
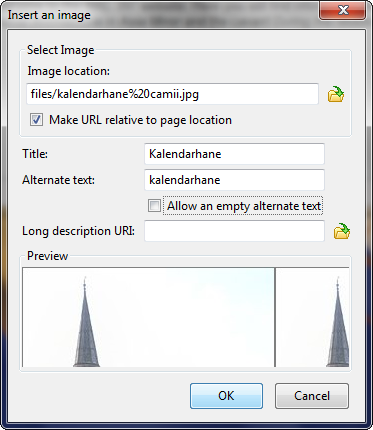
Fig. 2-22
Then you will be returned to the Insert an image window (Fig. 2-22). Click the check box that says Make URL relative to page location, which will ensure that your image will remain visible after it is uploaded from your hard drive to the web server via FTP. Enter in a title for the picture, as well as its Alternate text. Known as "alt text," this will be what is read in place of the image by assistive software. When finished, click OK.
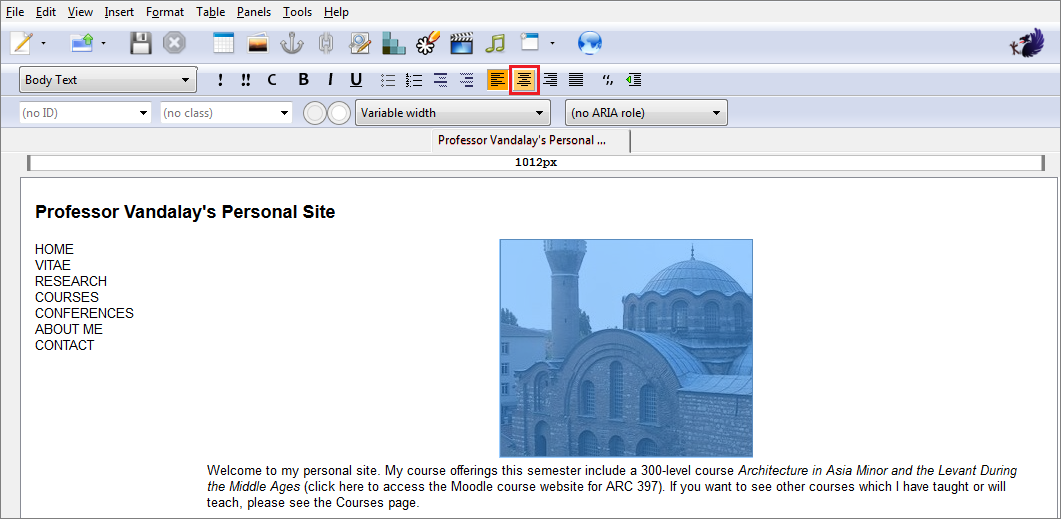
Fig. 2-23
Once the image appears, select it, and center it above the body text of the Home Page (Fig. 2-23)

Fig. 2-24
The home page has now been completed.
Now that you have finished the content of your page, you can then begin formatting the text, which will be covered in the next section on Paragraph and Text Formatting.
<< Creating the Site Directory | Paragraph and Text Formatting >>
[Back to Top]