Microsoft Word 2013 Tutorial
Tables | Tutorial Main Menu | Training Homepage | Paragraphs/Headings
Section 6: Margins
Setting margins for your document in Word 2013 is a simple process. It can be done one of two ways: either by selecting from the Margins drop-down menu, or by manual entry.
Selecting a Preset Margin

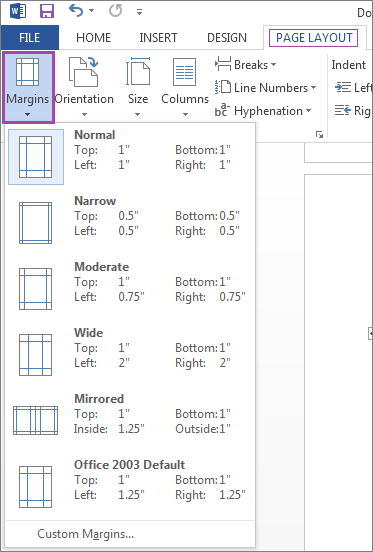
Figure 6-1
To select a margin already preset by Microsoft Word, click on the PAGE LAYOUT tab and then Margins. A drop-down menu will appear, giving you several commonly used margin options.
Specifying a Custom Margin

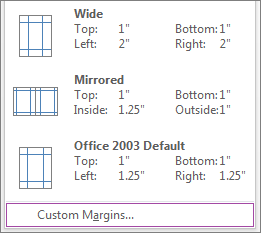
Figure 6-2
If you would rather specify your own margin, you can do that as well. On the Margins drop-down menu, simply select Custom Margins. A window will appear (see Fig. 6-3 below), prompting you to set your custom settings.

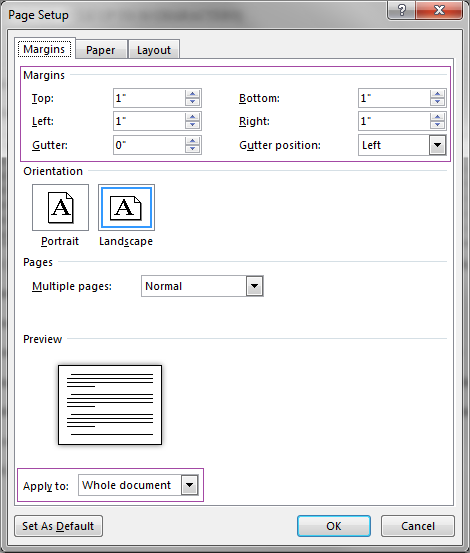
Figure 6-3
In the Page Setup window, you can enter your custom margins. In addition to the top, bottom, left, and right margins, you can also specify your gutter width and position. A gutter is extra space between the margin and the text, where your document will be bound, and can placed on either side, the top, or even in between the inside margins (for instance, when binding a booklet). You can also specify whether you want your custom margins to apply to the entire document, or to a block of selected text.
[Back to Top]